
Full Home Remodeling Process
- Step By Step Guide
How It Works
A full home remodel involves more than updating individual rooms. Whether you’re renovating a kitchen and bathrooms, opening up living spaces, replacing flooring, or transforming several areas at once, the goal is to create a home that feels connected, functional, and thoughtfully designed.
Every successful remodel begins with understanding what works in your existing home, what needs improvement, and how the different spaces should come together. Careful planning and coordination help ensure the finished home feels like one complete design rather than a collection of separate projects.
- Step 1
Planning, Design & Scope
We begin by reviewing the existing spaces, understanding the homeowner’s goals, and developing a clear design direction and scope of work.
Depending on the project, this may include changes to room layouts, walls, door openings, kitchens, bathrooms, cabinetry, lighting, flooring, and other features throughout the home.
Because one decision can affect several areas, thoughtful planning helps us coordinate the work, identify potential challenges early, and establish a clear direction before construction begins.
- Step 2
Material Selection
Selecting materials early helps create a consistent design throughout the home while minimizing potential delays during construction.
We guide homeowners through selections such as flooring, tile, cabinetry, countertops, plumbing fixtures, lighting, doors, paint colors, hardware, and other finishes.
Special attention is given to how these materials complement one another, creating a balanced and cohesive look from room to room.
- Step 3
Site Protection & Demolition
Before demolition begins, we carefully protect the areas of your home that will remain, including flooring, stairways, railings, furniture, and other finished surfaces.
Where practical, we install protective coverings, dust barriers, and temporary zippered doors to help contain construction dust and minimize disruption.
Depending on the project’s size and whether the home is occupied, demolition may take place in stages or across multiple areas.
Debris is removed, and work areas are cleaned and prepared for the next construction phases.
- Step 4
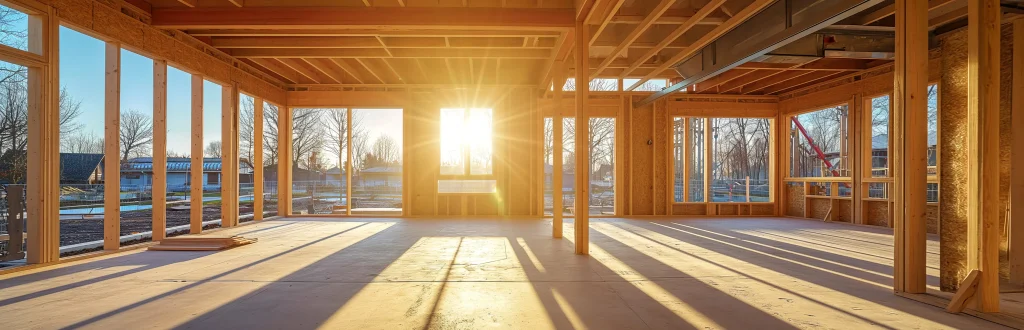
Framing & Layout Changes
Following demolition, we begin the framing and layout modifications included in the approved design.
This may involve creating or removing walls, modifying door openings, adding structural support, installing blocking, or repairing existing framing.
Where load-bearing walls, beams, or other structural components are involved, work follows the approved plans and applicable engineering requirements.
This is an exciting stage, as the home’s new layout begins taking shape and the planned changes become more visible.
- Step 5
Rough Plumbing, Electrical & Mechanical
With framing underway or completed as required, we begin coordinating the plumbing, electrical, and mechanical modifications needed for the new layout.
Depending on the project, this may include relocating water lines and drains, adding outlets and dedicated circuits, updating lighting locations, modifying HVAC systems, or improving ventilation.
Because these systems often share space behind walls, ceilings, and floors, careful trade coordination is essential.
All work follows the approved project scope, applicable building codes, and permit requirements.
- Step 6
Inspections
For permitted projects, inspections are an important part of ensuring work meets applicable building requirements.
Depending on the scope, inspections may include framing, plumbing, electrical, mechanical, insulation, waterproofing, and other construction stages.
We coordinate the required inspections and schedule subsequent work around their completion, helping the project move forward efficiently without overlooking important requirements.
- Step 7
Drywall, Wall Preparation & Interior Surfaces
Once the necessary rough work and inspections are complete, we begin closing and preparing the walls and ceilings.
This may include insulation, drywall installation, patching, taping, texture matching, and ceiling repairs.
Proper preparation creates the foundation for cabinetry, painting, trim, and other finished surfaces, helping the remodeled spaces begin to take their final shape.
- Step 8
Flooring, Tile & Finish Materials
As the major construction and wall preparation progress, we begin installing the selected flooring, tile, and other interior finishes according to the project’s sequence.
This may include hardwood or luxury vinyl flooring, bathroom tile, shower finishes, backsplashes, and decorative wall features.
Special attention is given to flooring heights, thresholds, transitions, and how finishes connect between rooms.
These details help create a consistent appearance and comfortable flow throughout the home.
- Step 9
Cabinetry, Countertops & Built-In Features
Once the appropriate areas are prepared, we begin installing cabinetry and built-in features throughout the home.
Depending on the design, this may include kitchen cabinets, bathroom vanities, laundry cabinetry, storage solutions, floating shelves, and custom entertainment units.
Cabinetry is carefully positioned, leveled, and secured before the applicable countertops are measured, fabricated, and installed.
Proper alignment, fit, and coordination with surrounding finishes help these features feel naturally integrated into the overall design.
- Step 10
Painting & Finish Carpentry
As construction moves toward completion, we focus on the finishing details that bring the different spaces together.
This may include interior doors, baseboards, casings, crown molding, decorative trim, shelving, surface preparation, and painting.
Although these details may seem small compared to major construction work, they play an important role in creating a clean, consistent, and properly finished home.
- Step 11
Fixtures, Appliances & Final Installations
With the major finishes in place, we begin installing the remaining fixtures, appliances, and accessories.
Depending on the project, this may include sinks, faucets, toilets, appliances, lighting, outlets, switches, mirrors, shower glass, cabinet hardware, and other final details.
Final adjustments and testing help ensure the installed features function as intended. This is where the individual rooms and carefully planned selections begin coming together as one finished home.
- Step 12
Final Touch-Ups & Walkthrough
Before completing the project, we carefully review the remodeled areas and address the remaining finishing details.
During the final walkthrough, we review the completed work with the homeowner and identify any outstanding adjustments or punch-list items to be addressed during project closeout.
For us, completing a full home remodel isn’t simply about finishing individual rooms. It’s about making sure the spaces work together, the details have been properly addressed, and the entire home feels connected, comfortable, and thoughtfully finished.